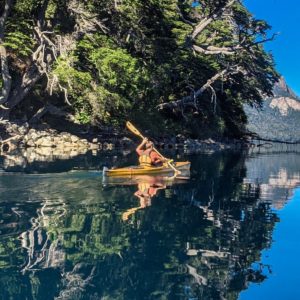
Although kayaks have been used for more than 4000 years by the Inuit and other peoples, I’m sure you have come here to learn how to kayak for recreational purposes, and not to hunt in icy waters.
Fortunately, this will make kayaking much easier to learn, as well as more enjoyable. That said, I still recommend you take kayaking lessons before going out on a paddling trip on your own.
If for any reason this is not possible, this kayaking guide for beginners will cover everything you need to know for a smooth first experience. Most of all, I want to prepare you for any hardships and dangers that might arise from a lack of preparedness.
After all, we want this to be your best day ever, not the scare of your life!
Physical and Mental Preparation
Before engaging in any outdoor activity, it’s very important to be prepared so you can enjoy your day and avoid potential hardships.
Before you even consider to start kayaking, you will need to 1) overcome your fears, 2) know how to swim and 3) get in shape; as explained below.
Overcome your fears
If you start panicking as soon as your feet stop touching the ground, you should not go kayaking.
You will need to take lessons first to overcome your aquaphobia and any other fears you might have. You will find countless kayaking clubs near you, so feel free to go and check them out before making a decision.
Know how to swim
You could kayak without knowing how to swim, but what will you do in case of an emergency?

You know the saying, it’s always better to be safe than sorry. Besides, swimming is a really fun activity and one you will most definitely enjoy all your life. This will also help you overcome your fear of water, if any.
Get in OK shape
Kayaking is not hard, but you should at least have some balance and body strength to enter and exit your kayak safely, as well as paddle with minimum effort.
A good rule of thumb is that if you can’t walk for 30 minutes at a decent pace without being exhausted, you shouldn’t go kayaking.
You should also be very careful if you have stiff shoulders, arms or torso. You will need some flexibility to kayak, so try to practice the movements at home and see how you feel.
Planning Your Day
Now that you’re physically and mentally ready to start kayaking, let’s find where and when to go have some fun kayaking!
Where To Go
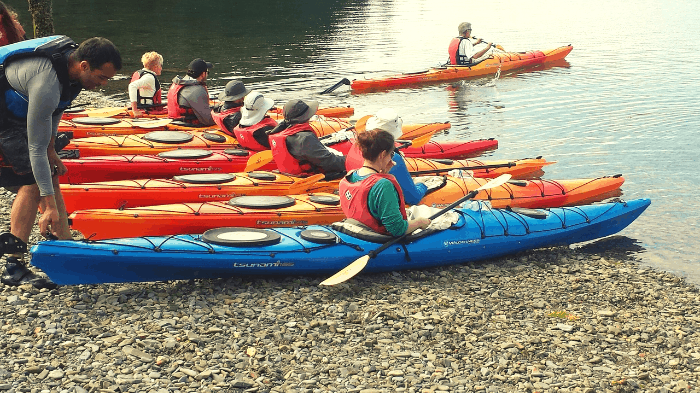
You should choose a small, calm body of water for your first kayaking trips.
Lakes are better than rivers because there are no currents, which means you will have more control over your kayak and you will paddle more easily. Avoid the open ocean if it’s your first time kayaking, even if you have the best kayak money can buy.
If available, a gently sloping sandy beach is preferable to launch your kayak effortlessly. You should at least have a big enough area at knee-depth to be able to get in your kayak easily. Getting in your kayak from a dock is also possible, but slightly more technical.
When to go
Try to go on a sunny, windless day during spring or summer to fully enjoy your day.
You should go to enjoy, not to compete. This means you should aim for less than 2 hours for your first kayaking sessions to make the most out of your day without excess fatigue.
How to be safe at all times
Apart from the tips below, I strongly recommend you to take lessons before your first kayaking trip.
There are many kayaking clubs all over the country, and learning in person is always better and safer than reading a blog post or watching videos.
Never go alone
You should never go kayaking alone. Always go with another experienced kayaker, at the very least.
If you do not know any experienced kayaker, you can find kayaking groups on Meetup or similar websites.

Make sure your kayaking partner stays with you at all times, as you need to be able to help each other in case of an emergency. If they feel like racing today, then nothing stops them from going back and forth, so that they’re always near you.
Know your limits
First of all, you should always stay within swimming distance of the shore during your first kayaking sessions.
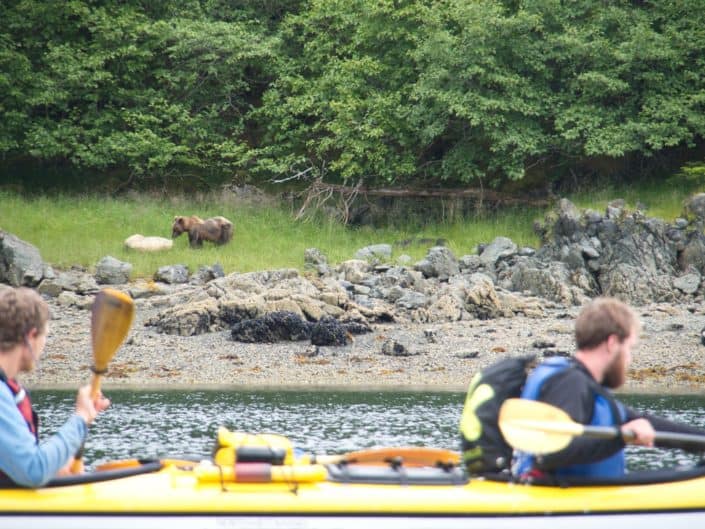
Second, you should follow the previous section, “Planning Your Day”, so that you are aware of any potential hazards and hardships, such as currents, tides, weather, wild animals and specific laws. This also includes wearing a wetsuit if the water temperature is below 65°F.
Make sure to wear and adjust your PFD (Personal Flotation Device, aka life vest) before entering your kayak. If you are too hot and need to take your vest off, you should go back to shore to take off your PFD. Do not take off your PFD while on the water.
Tools and techniques
You should always bring a whistle with you. The universal distress signal is three long blasts.
Additionally, you should know how to rescue yourself and others. This includes learning how to tow another kayak as well as how to wet exit and reenter your kayak (more on that later).
Parts of a kayak
Knowing the names of the different parts of a kayak will come in handy to avoid confusion.
Here’s a visual guide with the different parts you need to know.
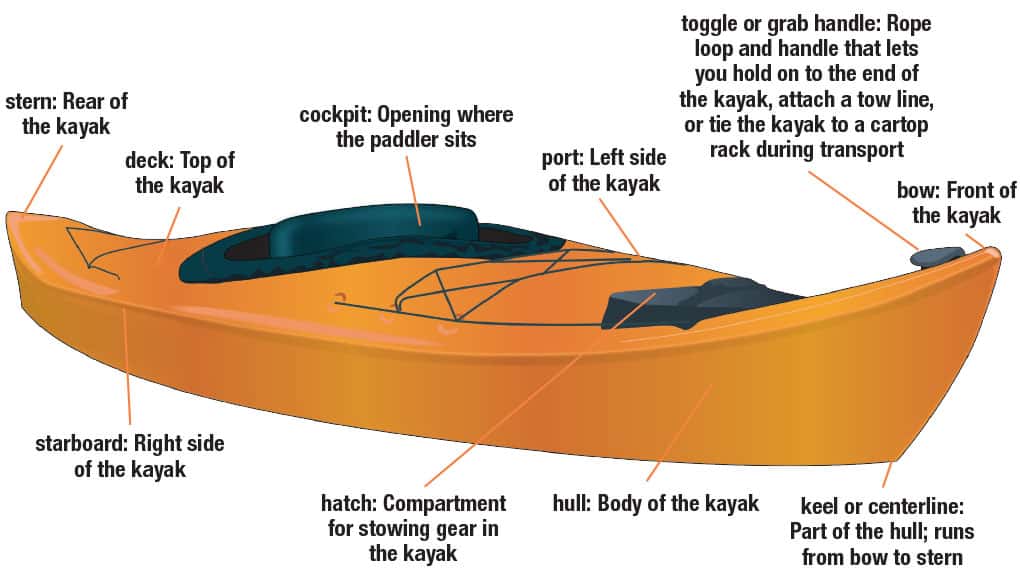
Image source: Boat-ed.com
Equipment
There’s truly nothing worse than having bad equipment on your first kayaking trip, and I’m talking from experience here.
If you don’t want to paddle like crazy to go as fast as a sloth, and most of all, to be safe in case everything doesn’t go as planned, you should always bring the best equipment to your paddling day.
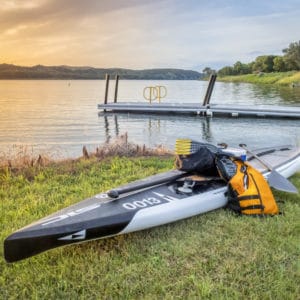
Kayak
If you have never kayaked before, you should not buy a kayak right away. Instead, go to a rental shop and talk to the owner or seller so that they can help you rent the right kayak for your first trip.
If you absolutely need to buy a kayak or if the rental shop staff is not very helpful, here’s a detailed guide on how to choose a kayak.
Kayaking Essentials
If you rent your kayak, you should also be provided with the following:
- A PFD that fits
- A paddle that suits you
- A bilge pump – to remove water trapped inside your kayak, very important after capsizing
- A spray skirt – may not be necessary on warm, calm days
- A paddle float – life-saver if you capsize
Clothing
You should always dress for the water, not for the weather. Wear a wetsuit if the water is below 65°F, and avoid cotton like the plague.
On a warm, sunny day, the following clothes will allow you to make the most out of your trip:
- Swimwear or shorts (nonbinding)
- Rashguard top or any noncotton top
- Kayaking shoes
- Cap or hat to avoid sunstroke
On a cooler, windier day, you should also wear the following:
- Lightweight fleece jacket or vest
- Spray jacket or rain jacket
- Pants
Personal and Safety Items
At the very least, you should always bring the following safety items:
- Signaling whistle. Three long blasts are the universal distress signal.
- First-aid kit
- Watch – so you can get back on time
- Headlamp – in case you were too slow getting back
- Plenty of water – even if you won’t drink it all, dehydration is much worse than carrying one extra pound of water
- Sunscreen – SPF 30 or above
The following items may not be necessary, but they will come in handy:
- Dry bag – to keep all your belongings safe
- Snacks to get some energy – don’t eat too much so you don’t feel sluggish
- Sunglasses
- Lip balm
- Cell phone – in case of an emergency, smartphones will often get signal on the water (on a lake or river)
Additionally, don’t forget to bring a change of clothes! You will probably get wet, and unless you came by foot, you will need to be comfortable on the drive back home.
Transportation
Transporting your kayak will be different if you are within walking distance or if you need to drive to get there.
For this reason, I suggest reading this detailed article on properly transporting your kayak, by foot or by car.
How to adjust your kayak
Before putting the kayak in the water, you will need to put it on the ground and start adjusting it.
Start by sitting in your kayak, and firmly snug your butt against the seatback. While kayaking, you will need to sit upright at all times, back pressed against the seat to gain balance and avoid wasting energy.
Place your feet on the footpegs and start adjusting them so that your knees are bent and in contact with the sides of the kayak for better balance on the water. Do not press your knees too hard against the sides, because you need to be able to wet exit easily if you capsize.
If you are using a tandem kayak, the heavier person should always sit in the back. This will allow you to have more control over your kayak and to avoid excess friction, thus gaining speed.
How to launch your kayak
Place the kayak in knee-deep water close to the shore. The bow (front) should be toward the water while the stern (rear) is toward the shore.
Stand over the kayak, straddling the cockpit coaming with one hand and holding the paddle in your other hand. Use the paddle as an outrigger while you put your butt inside the kayak, followed by one leg, and the other one. Try to be as smooth as possible to avoid capsizing right away.
Once you are in the kayak, position yourself correctly – as described in the previous section – and slowly get away from the shore, using your hands if the water is too shallow to use the paddle.
Once you are afloat and balanced, attach your spray skirt.
To exit your kayak, simply follow the previous steps backward: set your paddle as an outrigger, take one leg out, then the other leg, then your butt.
Here is a video that will help you visualize all these steps.
How to paddle
While kayaking, always remember to use your core and not your arms. Your core is stronger and will last much longer. This means that you will always be rotating your torso and barely moving your arms and shoulders.
If the day is windy or breezy, start by paddling into the wind. This will allow you to have a tailwind on your way back when you are already tired.
How to hold your paddle
First of all, you should grab the paddle at about elbow’s length. The wider your grip, the harder it will be to paddle, but the faster you can ultimately go. Your grip should be totally relaxed so that you can enjoy your kayaking trip.
As a beginner, you might want to align your paddle blades if they are feathered (one blade is vertical while the other is horizontal). Feathered blades are useful to avoid air friction, but they might be trickier to use if this is your first time kayaking.
Make sure the longer edge of the blades is on top, and place your knuckles on top of the paddle shack so they’re in line with the top of the blades.
The scooped side of the blades should be facing you.
Kayaking strokes
Here is a complete video that shows you the different paddling techniques to maneuver your kayak.
Below, you will find links to the most important kayaking strokes you need to master if you are more of a reader than a watcher.
Forward/Rear stroke
Follow these instructions to learn how to paddle forward.
To paddle backward, simply do the movement backward, starting at your hip and ending at your feet.
Sweep strokes – to turn
While putting your paddle on one side without moving it can allow you to turn, it will also slow you down.
This is why it can be a good idea to master the sweep strokes so that you can turn without losing speed.
Here is how to do sweep strokes.
Sculling draw – moving sideways
When you need to move sideways, you need to master a technique called the sculling draw.
It can be easier to visualize it as “spreading butter on a toast” with your paddle.
Check how to move sideways with the sculling draw.
How to use rudders and skegs
If you followed the Planning section instructions, you should not need to use rudders or skegs, as these are mainly useful in windy conditions.
But in case you need to use them, follow these instructions, and above all, remember to always pull them up in shallow water to avoid damage.
How to use rudders
If you see a rudder at the back of your boat, it means you can control the direction of your kayak with your feet (instead of using sweep strokes). A rudder is particularly helpful in windy conditions, to keep going forward as the wind pushes your stern to the left or right.
Push your right foot peg to turn on the right, and your left foot peg to turn on the left. Easy-peasy.
How to use skegs
Like rudders, a skeg is used in windy conditions to help with tracking (going forward). It’s basically a fixed fin that drops from the skern of your kayak.
You will find a slide on one side of your kayak to adjust its depth. The deeper you make it go, the more stabilization it will provide.
What to do if you capsize
Capsizing is fairly common while kayaking, which also means you shouldn’t let that ruin your day.
Instead, treat capsizing as part of the learning process, and have a good laugh if your kayak suddenly turns upside down.
Remember, you’re here to have fun, not to compete.
How to wet exit with a spray skirt
If you are using a spray skirt, you should always practice wet exiting before your first paddling trip, as not knowing the proper steps might prove deadly (because you will be stuck underwater and unable to breathe).
Basically, you need to remember to “Tuck, Pull and Push”, as shown in the video below.
How to get back into your kayak
As a beginner, you will probably need to use a paddle float to get back into your kayak. Therefore, make sure you have been provided with one before putting your kayak afloat.
Here is a video you must watch to understand the proper technique. It is fairly easy to accomplish, and you will only need to use the bilge pump afterward to remove excess water.
Kayaking with the family
Before taking your kids on a kayaking trip, it is absolutely essential to take many lessons and to master kayaking
Once you are an experienced kayaker, you still need to be careful as children may often be unpredictable and expose themselves to danger.
Specifically, you should only go for 30-minute kayaking sessions at first, so that you can all enjoy your day and avoid hassles and potential dangers.
Kayaking with your family is a wonderful time, but you should be fully prepared before exposing your children to danger
How to Kayak – Summary
Remember to be extra careful so you can truly enjoy your day out, which includes learning the proper kayaking skills as well as rescue maneuvers.
Be gentle with yourself and choose the right day and place to go kayaking for your first trips. Generally, beginners tend to be overzealous and often neglect the potential hazards of any outdoor activity.
Remember that you are doing this to spend a great day, so treat this outing as fun and make it easy on yourself.
In short: Enjoy!
P.S: If you’re looking for other activities besides kayaking, check out this great article on the best 7 sports for thrill-seekers.